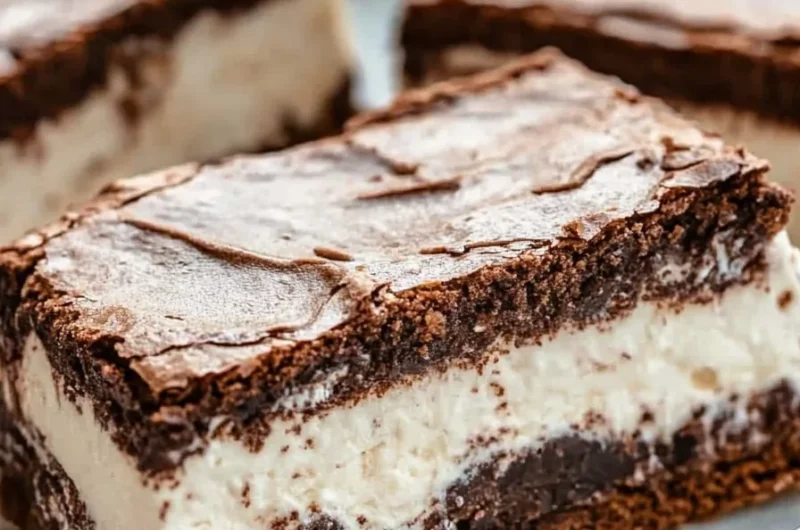
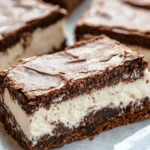
Brownie Ice Cream Sandwiches are an amazing treat that combines the rich, fudgy flavors of brownies with the creamy goodness of ice cream. This delightful dessert offers a perfect balance of textures and tastes that will leave your taste buds begging for more. Imagine biting into a soft, chewy brownie layer, only to discover a luscious scoop of your favorite ice cream nestled in between. It’s a delightful culinary creation that is both indulgent and satisfying. Perfect for gatherings, special occasions, or simple evenings spent at home, these sandwiches deliver happiness in every bite.
If you’ve ever wondered how to create an unforgettable dessert experience, this Brownie Ice Cream Sandwich recipe will be your go-to choice. The process is surprisingly simple. With only a handful of ingredients, you can craft a dessert that evokes joy and nostalgia. Whether you’re entertaining friends or treating yourself, this delightful combination of brownies and ice cream is sure to impress.
The appeal of Brownie Ice Cream Sandwiches lies not just in their taste, but also in their versatility. You can customize them with various ice cream flavors and toppings, catering to different preferences. So, let’s explore why this incredible dessert is perfect for any occasion and how you can easily create your own batch at home!
Why You’ll Love This Recipe
Brownie Ice Cream Sandwiches offer a delightful fusion of flavors and textures that your friends and family will adore. Here are some of the primary reasons why this dessert will steal your heart:
1. Simple Preparation: The ingredients are easy to find, and the process is straightforward, making it accessible for bakers of all skill levels.
2. Impressive Presentation: Arranged neatly, these sandwiches look stunning on any dessert table, making them perfect for gatherings.
3. Customizable Flavors: You can mix and match brownie types, ice cream flavors, and even add toppings to fit any occasion or preference.
4. Perfect for Any Season: Whether it’s cold winter nights or warm summer days, Brownie Ice Cream Sandwiches are enjoyable at any time of the year.
5. Deliciously Indulgent: The rich, chocolatey brownies paired with velvety ice cream create a decadent treat that will satisfy any sweet craving.
6. Fun to Make Together: This recipe is perfect for a family activity, allowing everyone to pitch in and customize their own sandwiches.
With so many winning points, it’s no surprise that Brownie Ice Cream Sandwiches have become a beloved dessert for many. They remind us of summer days and playful dining, making them a delightful addition to your recipe box.
Preparation and Cooking Time
Creating your own Brownie Ice Cream Sandwiches requires some time, but the end results are well worth the effort. Here’s a breakdown of the time you’ll need:
– Preparation Time: 20 minutes
– Baking Time: 25–30 minutes
– Cooling Time: 30 minutes
– Assembly Time: 15 minutes
In total, you can expect to spend about 90 minutes creating these delicious sandwiches. The cooling time allows the brownies to set perfectly, ensuring they hold together when you assemble your ice cream sandwiches.
Ingredients
– 1 cup unsalted butter
– 2 cups granulated sugar
– 4 large eggs
– 1 teaspoon vanilla extract
– 1 cup all-purpose flour
– 1 cup unsweetened cocoa powder
– ½ teaspoon salt
– ½ teaspoon baking powder
– 2 pints of your favorite ice cream
– Sprinkles or chopped nuts (optional, for toppings)
Step-by-Step Instructions
Creating Brownie Ice Cream Sandwiches is a fun and rewarding process. Just follow these easy steps:
1. Preheat the Oven: Preheat your oven to 350°F (175°C). Grease a 9×13-inch baking pan or line it with parchment paper.
2. Melt Butter: In a large saucepan, melt the butter over low heat. Remove from heat and stir in the sugar, eggs, and vanilla until well combined.
3. Mix Dry Ingredients: In a separate bowl, mix the flour, cocoa powder, salt, and baking powder.
4. Combine Ingredients: Gradually add the dry mixture into the butter mixture, stirring until just combined. Avoid over-mixing.
5. Pour Batter: Spread the brownie batter evenly in the prepared baking pan.
6. Bake: Bake in the preheated oven for 25–30 minutes, or until a toothpick inserted into the center comes out with a few moist crumbs.
7. Cool the Brownies: Allow the brownies to cool in the pan for about 30 minutes. Once cooled, lift them out of the pan using the parchment paper and place on a wire rack.
8. Slice Brownies: Cut the brownies into squares or rectangles, depending on your preferred sandwich size.
9. Scoop Ice Cream: Use an ice cream scoop to carefully place a generous scoop of ice cream on one brownie piece.
10. Top and Press: Place another brownie piece on top of the ice cream, pressing gently to create a sandwich.
11. Optional Toppings: Roll the edges in sprinkles or chopped nuts if desired for added texture and decoration.
12. Freeze the Sandwiches: Place the assembled sandwiches on a tray and freeze them for about 15-20 minutes before serving to help them hold together.
How to Serve
Serving your Brownie Ice Cream Sandwiches can turn a simply delicious treat into a memorable affair. Here are some tips to enhance the experience:
1. Presentation: Arrange the sandwiches on a decorative platter. For an added touch, consider using parchment paper or wax paper for a vintage feel.
2. Accompaniments: Pair your brownies with a drizzle of chocolate or caramel sauce, whipped cream, or fresh berries for added flavor.
3. Coffee or Milk: These sandwiches pair perfectly with a glass of cold milk or a cup of coffee, making for a delightful dessert experience.
4. Fun Toppings: Provide a variety of toppings for guests to customize their sandwiches, including chocolate chips, coconut flakes, or crushed candies.
5. Creative Flavor Combinations: Encourage creativity by suggesting combinations like mint chocolate chip ice cream with fudge brownies or cookie dough ice cream with peanut butter brownies.
By putting effort into how you serve these amazing Brownie Ice Cream Sandwiches, you can elevate the entire dessert experience, creating sweetness and joy for all who indulge!
Additional Tips
– Use High-Quality Cocoa: Selecting a premium cocoa powder will enhance the chocolate flavor in your brownies, making the sandwiches taste more decadent.
– Allow Brownies to Cool Completely: Ensure that your brownies are fully cooled before assembling the ice cream sandwiches. This prevents the ice cream from melting too quickly during assembly.
– Get Creative with Ice Cream Flavors: Experiment with unique ice cream flavors such as salted caramel, coffee, or even fruity options like raspberry. This will make your sandwiches even more exciting!
– Warm Your Brownies Slightly: For an extra special touch, consider warming your brownie sandwiches slightly in the microwave for 10-15 seconds before serving. This creates a melty, gooey experience.
– Use a Cookie Scoop: A cookie scoop is a great tool for portioning out perfectly sized ice cream scoops. It ensures each brownie sandwich is balanced in flavor and size.
Recipe Variation
Explore these delicious variations for your Brownie Ice Cream Sandwiches:
1. Brownie Brittle Sandwiches: Use brownie brittle instead of regular brownies for a crunchy twist. The crispy edges add an enjoyable texture.
2. Brownie Sundae Sandwich: Assemble your sandwich and then top it with whipped cream, chocolate syrup, and a cherry for a sundae-inspired treat.
3. Add-ins and Mix-ins: Stir in chocolate chips, nuts, or bits of your favorite candies into your brownie batter for added flavor and texture.
4. Vegan Option: Substitute the butter with a vegan butter alternative and use dairy-free ice cream to create a plant-based version of this treat.
5. Gluten-Free Version: Replace the all-purpose flour with a gluten-free baking blend to make this dessert suitable for those with gluten sensitivities.
Freezing and Storage
– Storage: Keep your assembled Brownie Ice Cream Sandwiches in an airtight container in the freezer. This helps avoid freezer burn and keeps them fresh.
– Freezing: They can be stored in the freezer for up to 1 month. Just ensure they are individually wrapped or placed in layers separated by parchment paper to avoid sticking.
– Thawing: To enjoy later, take them out and let them sit at room temperature for a few minutes before serving. This makes them easier to bite into without melting everywhere.
Special Equipment
You will need a few essential tools to prepare these Brownie Ice Cream Sandwiches successfully:
– Mixing Bowls: A large bowl for mixing your brownie batter and a separate bowl for your ice cream.
– Spatula: For spreading the brownie batter evenly in the pan.
– 9×13 inch Baking Pan: To bake the brownies.
– Parchment Paper: Optional but recommended for easy removal of brownies from the pan.
– Ice Cream Scoop: Useful for adding uniform scoops of ice cream, ensuring each sandwich is perfectly sized.
Frequently Asked Questions
Can I use cookie dough instead of brownies?
Yes, using cookie dough can create scrumptious cookie ice cream sandwiches – it’s a delightful variation worth trying!
What is the best way to cut the brownies?
Allow your brownies to cool completely. Use a sharp knife, and for cleaner cuts, run the knife under hot water and dry it off before slicing.
Can I make these sandwiches ahead of time?
Absolutely! You can assemble the sandwiches a few days in advance and store them in the freezer. Just ensure they are well-wrapped to avoid freezer burn.
What types of ice cream work best?
Any flavor that pairs well with chocolate is great, such as vanilla, mint chocolate chip, or cookies and cream. Get creative based on your preferences!
How do I keep the brownies from sticking to the pan?
Greasing the pan thoroughly or using parchment paper to line the baking pan will prevent sticking. If using parchment, allow some overhang for easy lifting.
Conclusion
Brownie Ice Cream Sandwiches are an unbeatable dessert that perfectly combines the rich taste of brownies with the smoothness of ice cream. This fusion makes for a delightful treat that can be easily customized to suit any occasion or flavor preference. From their delicious taste to their beautiful presentation, these sandwiches are sure to impress friends and family alike. Whether you serve them at a summer barbecue, a birthday party, or just as a delightful surprise for yourself, they are sure to make any moment a bit sweeter. So gather your ingredients, follow the simple steps, and indulge in the joy of creating and sharing these delightful sandwiches!
Brownie Ice Cream Sandwiches: The Incredible Ultimate Dessert Recipe
- Total Time: 45 minute
Ingredients
– 1 cup unsalted butter
– 2 cups granulated sugar
– 4 large eggs
– 1 teaspoon vanilla extract
– 1 cup all-purpose flour
– 1 cup unsweetened cocoa powder
– ½ teaspoon salt
– ½ teaspoon baking powder
– 2 pints of your favorite ice cream
– Sprinkles or chopped nuts (optional, for toppings)
Instructions
Creating Brownie Ice Cream Sandwiches is a fun and rewarding process. Just follow these easy steps:
1. Preheat the Oven: Preheat your oven to 350°F (175°C). Grease a 9×13-inch baking pan or line it with parchment paper.
2. Melt Butter: In a large saucepan, melt the butter over low heat. Remove from heat and stir in the sugar, eggs, and vanilla until well combined.
3. Mix Dry Ingredients: In a separate bowl, mix the flour, cocoa powder, salt, and baking powder.
4. Combine Ingredients: Gradually add the dry mixture into the butter mixture, stirring until just combined. Avoid over-mixing.
5. Pour Batter: Spread the brownie batter evenly in the prepared baking pan.
6. Bake: Bake in the preheated oven for 25–30 minutes, or until a toothpick inserted into the center comes out with a few moist crumbs.
7. Cool the Brownies: Allow the brownies to cool in the pan for about 30 minutes. Once cooled, lift them out of the pan using the parchment paper and place on a wire rack.
8. Slice Brownies: Cut the brownies into squares or rectangles, depending on your preferred sandwich size.
9. Scoop Ice Cream: Use an ice cream scoop to carefully place a generous scoop of ice cream on one brownie piece.
10. Top and Press: Place another brownie piece on top of the ice cream, pressing gently to create a sandwich.
11. Optional Toppings: Roll the edges in sprinkles or chopped nuts if desired for added texture and decoration.
12. Freeze the Sandwiches: Place the assembled sandwiches on a tray and freeze them for about 15-20 minutes before serving to help them hold together.
- Prep Time: 20 minutes
- Cook Time: 25–30 minutes
Nutrition
- Serving Size: 12 sandwiches
- Calories: 350 kcal
- Fat: 15g
- Protein: 5g